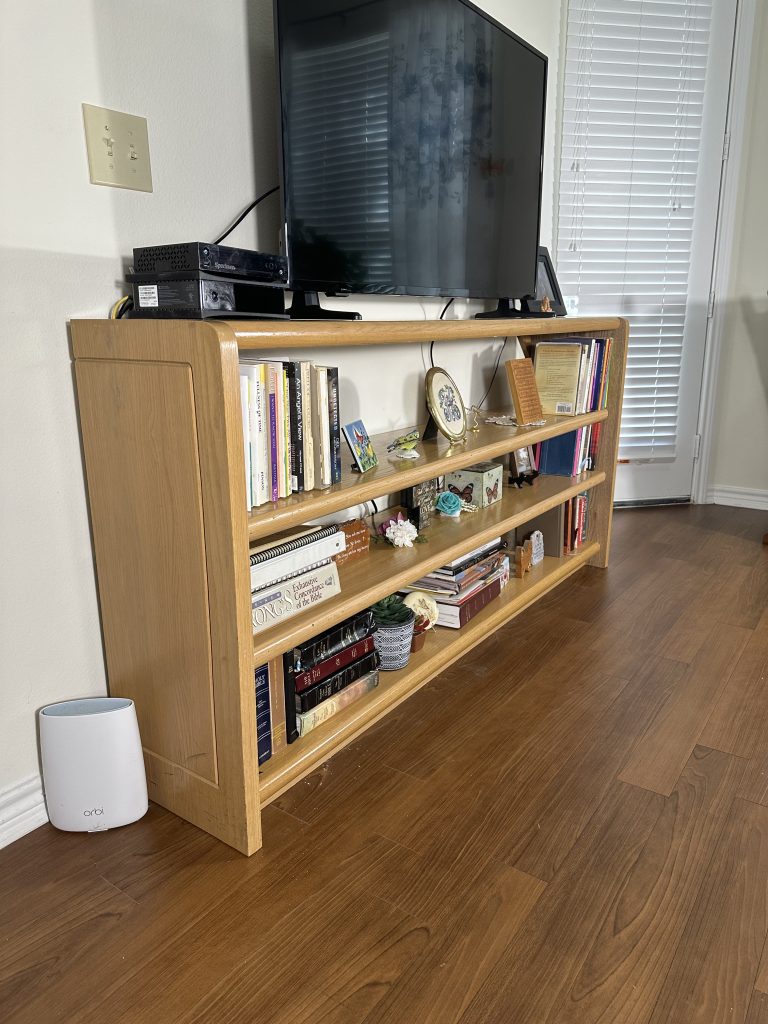
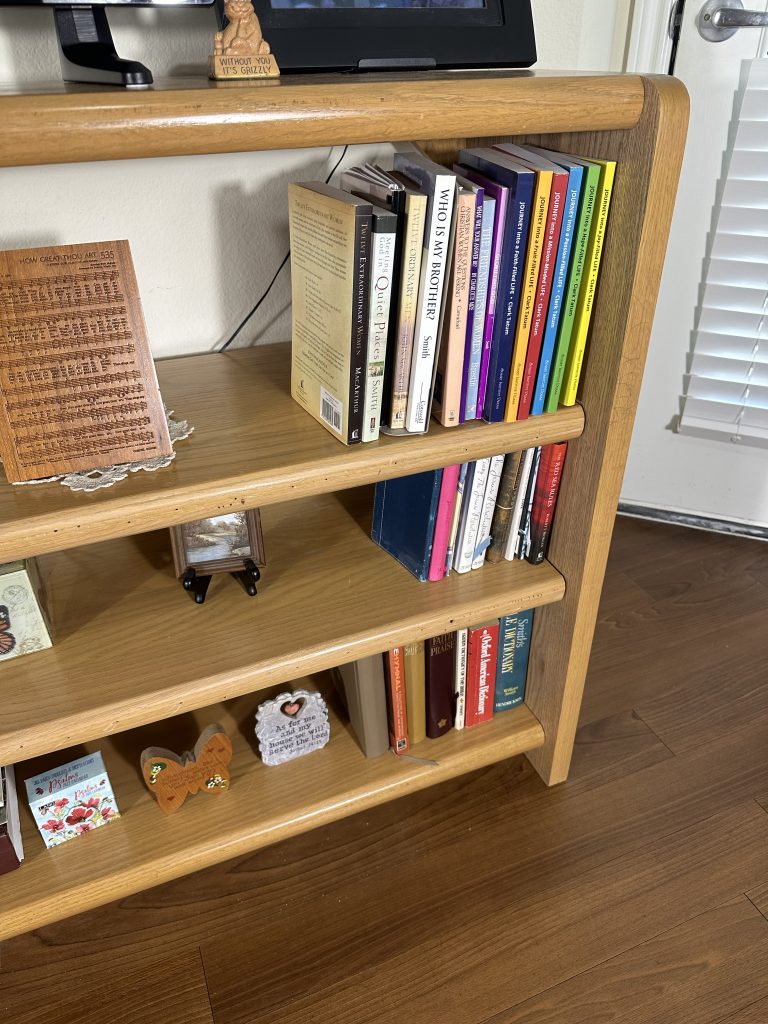
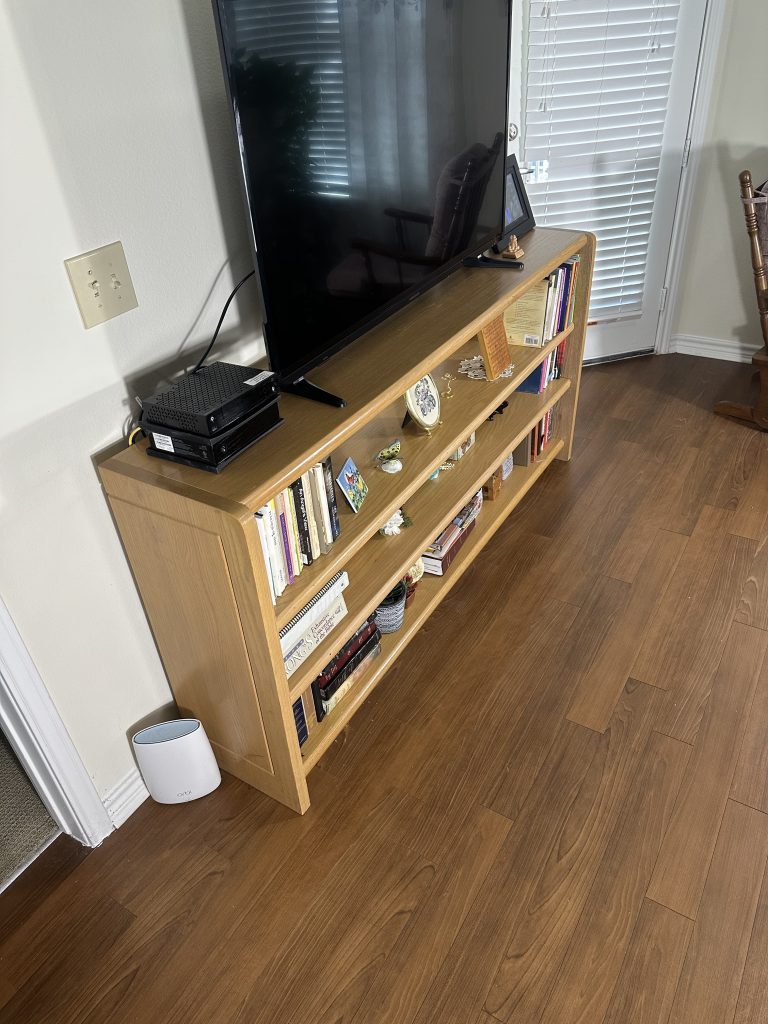
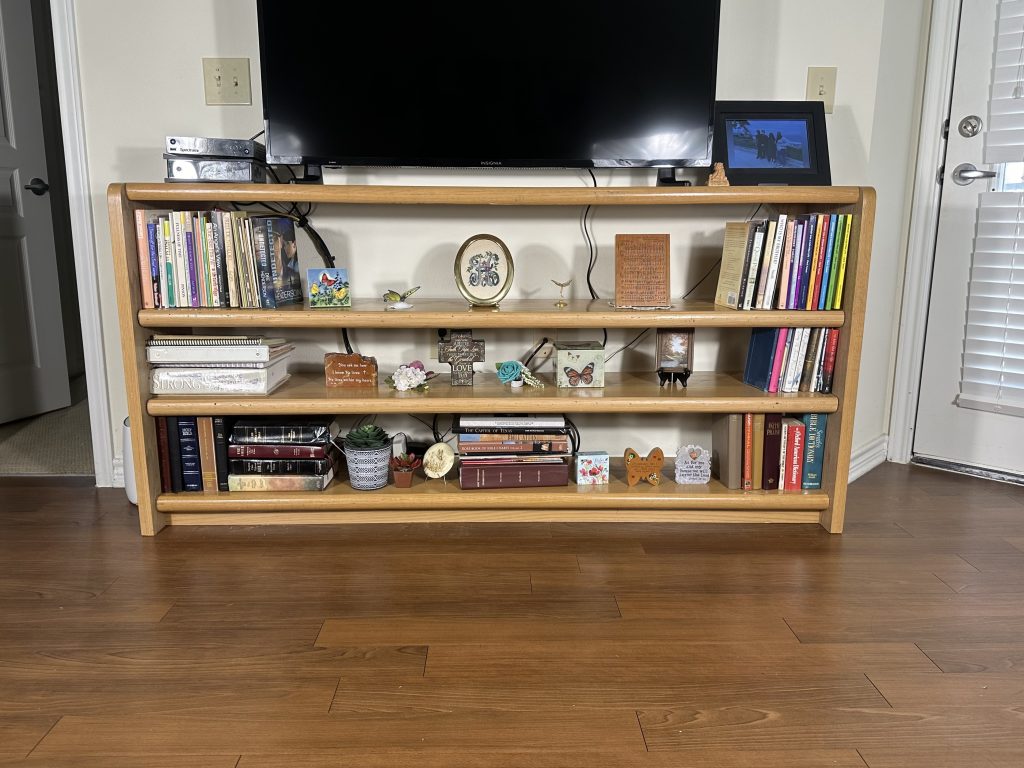
I recently acquired a broken church pew from the church where I grew up going to and my mom still attends. These pews held so many memories, that I needed to do something unique with it. Mom had some old bookcases, that were in need of an upgrade, so I built her a new bookshelf from the parts. I really wanted to retain as much of the original finish and patina as possible, so the objective was to maximize the use of the existing wood so that it was obviously on old pew. Mom was really pleased when we delivered it to her.
Build steps (if you want to do something similar):
- Disassemble, and remove all screws (looking for any broken screws).
- Cut the pew ends to 13-7/8″ deep, keeping good sides for front.
- Plane the ends to 1-1/4″ thick, only planing the pew inside and keeping the outside face intact.
- Stain inside of pew ends to match existing finish (as close as possible), then apply a couple coats of wipe on poly for protection. since these will be the inside faces of the end panels, they will not be seen much.
- Cut pew backs to 13″ x 68″ (keeping top edge with profile) – 2 are needed.
- Note: cut the 68″ length first so remainder can be used for bottom supports and will already be the right length.
- Keep offcuts for later steps.
- Mark and cut 4 dominos or dowels for each upper end (top panel and top of pew end).
- Drill 3 Kreg screws into the underside of the top panel (between the dowels/dominos.
- Glue and screw the tops of the sides and the top panel – clamp with a 90-degree square to keep things from moving.
- Use one of the offcuts to create a triangle that is 4-1/2″ x 4-1/2″. Drill a couple of pocket screws in the back side of these and glue/screw in place of the temporary clamps. These will be on the back upper corners of the bookshelf.
- Cut one of the offcuts into two 2-7/8″ x 68″ pieces. These will be for the lower support.
- Drill pocket holes on the back side – 2 on each end, and 4 spread across the length. All pockets are on the same side of the wood.
- Flip the bookshelf into the upright position and install the bottom back support rail with glue/pocket screws.
- Clamp a 2-7/8″ spacer to the front of the end panel to set the front rail back, then screw it in place on both ends.
- Rotate the bookshelf so that it is resting on its back and slide the bottom shelf into place above the support rails.
- Using the 8 pre-drilled pocket holes, screw the bottom shelf into position.
- This will give you a very solid frame.
- Using a Shelf-Pin Jig (i.e. Kreg), screw 3 columns of pin holes on each side. I started at the back and worked my way to the front side.
- Cut the two shelves from the pew seat material. 12-7/8″ x 67-7/8″
- Set your shelf pins in the holes, and insert the shelves.